The extent of necessary repair work in DIY upholstery often remains unknown until the hard work of deconstruction is done – a scary prospect for some… you might be asking yourself “Will this be a total waste of my precious time?” But in truth the furniture that really is a waste of your time is usually obvious from the outset. For example, it will be apparent during the initial evaluation if any of the supporting rails, styles, posts or legs are broken beyond repair.
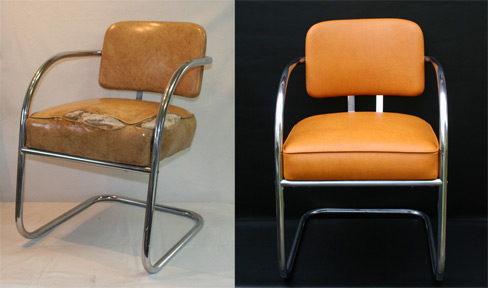
The frame or supporting structure of your chair may just need a bit of elbow grease and some new screws to return it to its original splendor
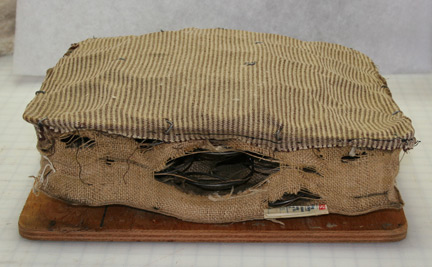
This old seat-spring unit from the chair pictured above was replaced with a high-quality seat foam to save the extensive time it would take to rebuild it
Now that you have the piece down to the ‘bare bones’ or at least down to its ‘skivvies’ you’re ready to clean the exposed wood and/or metal parts, tighten or replace screws or bolts, re-glue separated joints and do any refinishing you decided on in Step 1 – Evaluation. You can now clearly see and evaluate the frame and foundation elements, such as springs, webbing & platform wood.
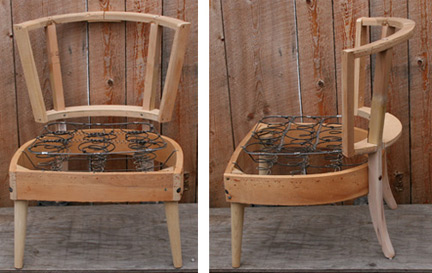
Upholstery removed and legs sanded for refinish
Springs may be reinforced in a variety of ways, or replaced altogether with new springs or a comfortable seat foam. Your options will depend on your chair’s particular construction.
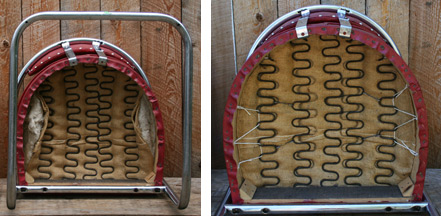
Spring reinforcement: a chair repair that was done without removing the upholstery
Wood joint failure may be the result of age, stress beyond intended use, exposure to moisture or design flaw.
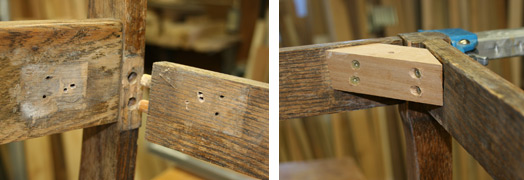
A doweled wood joint can be re-glued and the corner reinforced with bracing to restore it to like-new condition
Here you may find helpful advice from a professional woodworker or furniture restorer if you are unsure of how to proceed. Every chair will present its own unique challenges in the restoration process. These are just a few common situations you may encounter.
Built-up dirt and grime on the exposed wood or metal parts of the frame can be cleaned up with a commercial ‘green’ cleaner (see how top companies rate for chemical safety) or a homemade green cleaner. Always test your cleaner on an inconspicuous area of finished wood surface to be sure it doesn’t cause permanent discoloration (for example some lacquer finishes may turn white when wet).
If you decided to paint or refinish your chair frame, now is the time to break out the spray paint or strip the old finish and apply a new coat of whatever you have chosen to use.
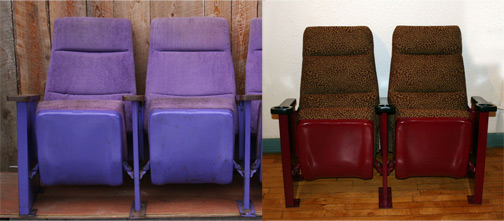
The paint on these metal-framed theater seats was cleaned thoroughly before applying several coats of a fresh new paint color
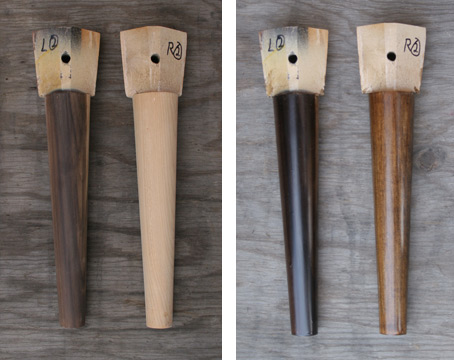
One dark leg dictated the final coloring of all legs on this chair
Previous: Step 4 – Deconstruction
Next: Step 6 – Reconstruction: Padding
Join NaturalUpholstery.com’s mailing list to receive our monthly newsletter with reupholstery tips, creative inspiration, and resources for using natural, non-toxic materials for upholstery.
This was very helpful. Particularly the deconstruction section. We have an old chair that is worth salvaging. It is a classic period piece, but it has been stored in a garage and we don’t know what might have made a warm home inside! Learning this part was a great help. Many thanks.
Hi Ann,
It’s great to hear this is helpful!
Carla