IMPORTANT NOTICE: We are no longer offering live workshops – check out other upholstery learning opportunities here.
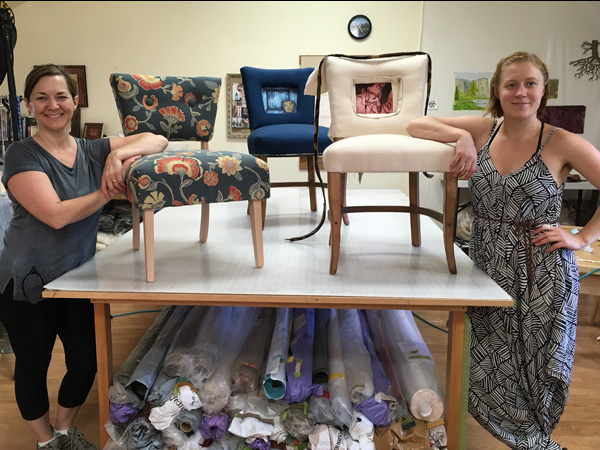
Kerri & Almira with their upholstery workshop projects
Learn the three R’s of upholstery working on your own chair!
- Repair: Learn how to tell if a chair is worth the work you will put into reupholstery. Take care of a wobbly frame with glue or screws, perform minor spring work (if needed), and gets things generally tightened up before you begin rebuilding the upholstery padding.
- Restore: Spiff up the frame with a light cleaning, OR go for a complete transformation with paint or refinishing (best done before class). Need new padding? Choose natural materials (natural latex foam & wool batting) or conventional – learn the difference between them.
- Restyle: The FUN part happens with your new fabric! You can also create an updated look with some minor adjustments to the padding & design (add a welt here, some buttons there).
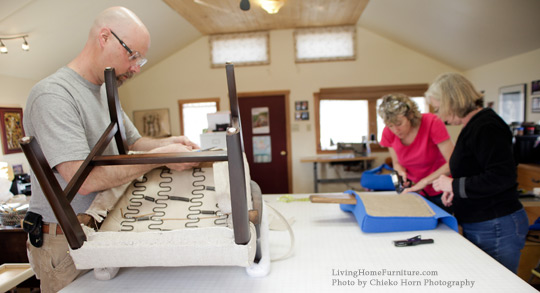
Students work on their chairs during the workshop with Carla (in the red shirt :)

Before & After: Deb chose a 50’s style rocker

Carla demonstrates deconstruction of an open-back chair
How do I know if my chair is right for the class?
The best beginner-level chairs have:
- An upholstered seat and back
- Open arms with minimal or no padding (or no arms)
- Simple backs (buttons and some tufting is okay)
- Check out my Pinterest board ‘Ideal First Upholstery Projects’
- Ottomans are okay too!
Important Note: I want you to be successful! My goal is to help you complete your project by the end of the workshop, with no loose ends. So… your chair must be pre-approved prior to registration.
Not permitted: oversized pieces, projects with major foundation issues, spring work, channeling, attached cushions or significant style changes. If you are interested in tackling more complex skills, please try a small project first. Intermediate/Advanced workshops are available for those who have successfully completed a beginner level chair and would like to move on to a more advanced level.

4 examples of chair styles acceptable for the Beginner Chair Upholstery Workshop
What the Workshop Includes:
• Two full days (16 hrs) of FUN & hard work (bring plenty of elbow grease!)
Yes, an intensive couple of days, but don’t worry – we’ll have good music and plenty of breaks (lunch, snacks, tea, and sometimes even dancing)!
• Intro Videos + Handouts:
As soon as your registration is complete, you’ll receive a link to view & download a series of videos & handouts, including:
- Class overview – what to expect when you bring your chair for the weekend workshop.
- Worksheets + Guides to help you get started.
- Instructions for deconstruction of your chair – depending on the complexity of your project, you may want to get a jump on the tear-down so you can complete your chair by Sunday afternoon of the workshop.
- How to evaluate your chair’s condition. If you determine that your chair needs structural repairs, a new plywood seat foundation, or refinishing/repainting, you’ll get guidance on how to get this done or do it yourself before the weekend session.
- How to measure and calculate how much fabric to buy for your project.
• (optional) Zoom video meet-up for Q&A:
Two weeks prior to to the weekend workshop, you’ll have a chance to meet your fellow students via zoom video, share your project and get your questions answered.
• We provide:
- use of all tools and sewing machines, thread, spring twine, tufting twine, staples, adhesive, covered button molds and hot glue
- professional tips & tricks of the trade
- helpful charts & handouts that you can take home and use on your next project :)
- a memorable experience and and skills that last a lifetime!
• You provide:
- your pre-approved chair
- upholstery fabric, foam and embellishments such as decorative nails & trim – amount to purchase is determined prior to class.
- A fee will be applied to these extra materials IF used in class: natural latex foam, dacron batting, cotton batting, wool batting, ticking fabric (for the wool batting), jute webbing, burlap, welt cord, zippers, springs and muslin fabric.
- the moxie to dive in and get your hands dirty!
Nothing beats the satisfaction and fun of restoring a chair in your own unique style and making new friends in the process!
Workshop Schedule
Intro Videos:
Immediately upon registration, you’ll receive access to Intro videos to help you get started on your project.
Prep Class (self-guided videos + optional zoom meet-up for Q&A):
It’s great fun getting everyone together prior to the Weekend Workshop Session, so I offer an optional zoom video meet-up 2 weeks before the workshop. It’s a fun chance to meet your fellow students, share ideas & challenges, and get your questions answered. Meet-ups last 30-60 min, depending on the projects and questions you bring.
HOMEWORK (recommended to do before weekend session):
- Purchase fabric & new foam (if needed)
- Deconstruction: remove the old fabric from your chair
- Complete any repairs and refinishing/repainting of your frame that may be necessary prior to weekend session
Weekend Workshop Session:
Two consecutive days (8 hrs/day) – You’ll arrive with your chair, fabric and ALL of the old materials that you removed in deconstruction. You’ll be guided through the steps of fitting & attaching your padding & fabric to your chair frame, including any stitching required such as welt or minor piecing of sections, as necessary.
Participants work independently on their projects, with support & hands on instruction personalized to each project. Mingling and cross-pollinating is encouraged! Half the fun is learning from each other’s challenges and sharing new ideas… common side effects are surprise & delight at unanticipated outcomes.

The possibilities for your chair’s new look are endless…
Note: A selection of upholstery fabric & natural padding materials (100% Natural Latex Foam & Wool Batting) will be optionally available for purchase from Carla’s studio. Please note that we do not have any petroleum-based urethane foams available, though we do have polyester batting.

Leslie with her chair Before & After the Beginner Chair Workshop
2-day Beginner Chair Upholstery Workshop (details)
Instructor: Carla Pyle
Dates: TBA
Class size: 3
Location: TBA
Class Fee: TBA
Springtime in the Rockies 3-day Advanced Upholstery Workshop (details)
This is a three-day intensive for students who have taken a previous workshop with Carla or another instructor. See this post for an overview and self-evaluation tips to see whether you’re ready for a more advanced project.
Instructor: Carla Pyle
Dates: TBA
Class size: 2-3
Location: TBA
Class Fee: TBA
IMPORTANT NOTICE: We are no longer offering live workshops – check out other upholstery learning opportunities here.
Leave A Comment