IMPORTANT NOTICE: We are no longer offering live workshops – check out other upholstery learning opportunities here.

I want to UP my upholstery skills: do I qualify as Advanced?
This is a great question that most students of upholstery ask when they feel ready for a step in a new direction. You have one or two or more Beginner level chairs under your belt. Now that one project that’s been calling to you from the very beginning – the one that got you INTO upholstery in the first place, but you were told it’s too advanced for a first project – is beckoning once again. And you find yourself asking “Am I ready NOW?”
The question invariably brings even MORE questions to the surface:
- How do I know where I fit on the scale of Beginner-Intermediate-Advanced?
- What exactly IS a ‘more advanced’ workshop?
- Am I biting off more than I can chew with this project?
All excellent questions, worth delving deeper to find the answer that fits YOUR personal answer. Because the answer won’t be the same for everyone.
‘Advanced’ is relative.
Relative to the INSTRUCTOR…
Every upholstery instructor employs their own individual methods and schedules for teaching, so you’ll find some variation on the definition of ‘advanced’ when applied to workshop descriptions. Of course there are standards in the old world sense – standards that define levels according to recognized accomplishments. Unfortunately the trade schools that used to uphold those standards are mostly gone in the U.S., so we’re on own own (at least for the time being).
This post is for my students, so we’ll address the question here solely for the purposes of upholstery workshops with Natural Upholstery. I’ve been teaching Beginner level workshops in Livingston, Montana since 2012, and I am a firm believer in PRACTICE.
- The variations in upholstery are endless, and the 2-day workshop is a great place to get comfortable with basic skills. This is a good one to repeat with different projects to get that practice.
- Begin with a simple project. Get to know the tools. Learn basic techniques, which might include cutting-in around a post, fitting fabric around seat corners, or finishing edges with double welt.
- Then hone some of those same skills on the next project, only this time with an added challenge like pleating or button-tufting.
- Practice again with a different project, and so on. Each project presents a new challenge. Maybe you’re working toward that one project that’s been calling to you from the very beginning, that project that you now realize – with the 20/20 vision of experience – is quite an ADVANCED project. A project that will not be completed in a 2-day workshop, or even a 3-day workshop. Maybe it’ll require two 3-day workshops.
… and relative to YOU.
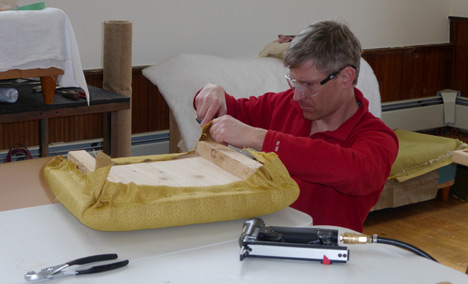
John trims upholstery fabric to fit the corners of his seat
Here’s a good place to take a good look at YOU. When considering a more advanced workshop project, there are a few reference points that will help:
What is your experience? Be sure you’re comfortable with the basics – I recommend getting 2 or 3 beginner level projects under your belt so you have a good solid idea of what you’re in for. Upholstery is notorious for throwing curve balls. Each new project presents a new set of challenges. Do you love a challenge?
Be prepared to do some homework. This is a biggie. Most students who are ready for a more advanced project know they can save time by tearing down at home and getting to a place where they can make the most of the help available in the classroom. If you want to tackle a project that you know will take some trial & error, be ready to do some work on your own at home, both before & after the class. If you don’t want to work at home, choose a simpler project.
What are your goals? Talk with your instructor about your experience and your goals and ask for their honest assessment of your project-fit for the workshop. Maybe you want to choose a project that has familiar elements so you can refine a specific technique. Maybe you’re just doing this for yourself, and are content to live with minor flaws that will fade from your attention with everyday use.
Business or Pleasure? Are you doing this for fun, or do you want to hone your skills to something you can offer as a paid service? Are you detail oriented and focused on perfection? Both of these scenarios will slow you down, and you may want to choose a project that you’ll be able to finish in the time allotted.

If you’re here for the social interaction of collaborating and learning from other students’ projects – well, that’s a bonus that we all enjoy (including the instructor ;)
Be realistic. (what can NOT be completed in a single 3-day workshop)
- Channel backs and wingbacks are best addressed in a longer term workshop.
- We do not have the space for anything oversized. Workshops take place in a second-floor studio, so keep in mind you’ll be carrying your project up a flight of stairs.
- If your chair needs extensive frame repair, you’ll need to get that taken care of before the workshop. We have the capacity to do minor repairs during the workshop.
- Be sure to get approval from your instructor if you think your project will involve tying springs.
IMPORTANT NOTICE: We are no longer offering live workshops – check out other upholstery learning opportunities here.
Leave A Comment